It seems that everyone is interested in finding a baby mobile for their infant daughters. Most of the time, you can go online and buy one, set the mobile up, and you’re done. However, there’s something even more precious about making your wooden nursery mobile yourself.
I know that when it came time to search for a crib mobile, I wasn’t satisfied with the options online. I didn’t think I needed all those bells and whistles, such as lights, projections, and music. Therefore, I decided to buy a DIY baby mobile kit. This project was something I worked on when I was too tired to do anything else right before my daughter came along.
Mobiles are a great way to soothe a fussy baby, but they really don’t need a lot of muss and fuss. I chose the Tatuo Nursery Mobile Crib Hanging DIY Wooden Handmade Kit for my girls’ nursery. Here’s what I have to say about it:
DIY Baby Mobile Kit from Tatuo
A quick search online helped me find the Tatuo DIY baby mobile, which is exactly what I wanted. Just remember that it isn’t colorful at first.
When I opened the box for the mobile, I found two semi-circle hanging parts with three large beads, six smaller beads, and an O-ring made of wood. There was also a needle, some embroidery floss (string), and a hanging loop made of plastic.
For the price, I couldn’t have done any better on this mobile. However, there were no toys or anything to hang on the DIY baby mobile. You could search online and find various toys that can be added later, but I chose a different route, which I explain later.
It was quite fun to put it all together, and the mobile looked plain and simple, which is what I wanted.
Surveying the Items and Gathering Supplies
Once you receive the DIY baby mobile kit, you should check to ensure that all the supplies are there. You should have two different semi-circle hanging pieces. One is 9.2 inches wide, and the other is 6.2 inches wide. The smaller one sits inside the larger one and can spin around for even more fun effects for your baby.
There are three different-sized beads. The largest one is 0.8 inches wide. You also get two 0.6-inch beads and six 0.3-inch beads. Later, I explain how to put it all together.
With that, you get the string to hold it all together and a needle to sew on the toys if you buy them separately. The price really isn’t that bad for all you get, but remember: you must put it together.
Instead of purchasing toys and adding to the price, I used paper toys that I made myself. It made the project a bit more colorful and fun.
Finding Time for the Project
One of the hardest things I had trouble with for this DIY baby mobile was finding the time to make it. While it’s not hard to do, there are plenty of other things I had to focus on, such as putting together the crib, babyproofing the nursery, and all the rest.
Still, mobiles are an important part of your baby’s sensory development, so it’s important not to forget this step. When I actually sat down to make it, it was fun and enjoyable!
The Steps
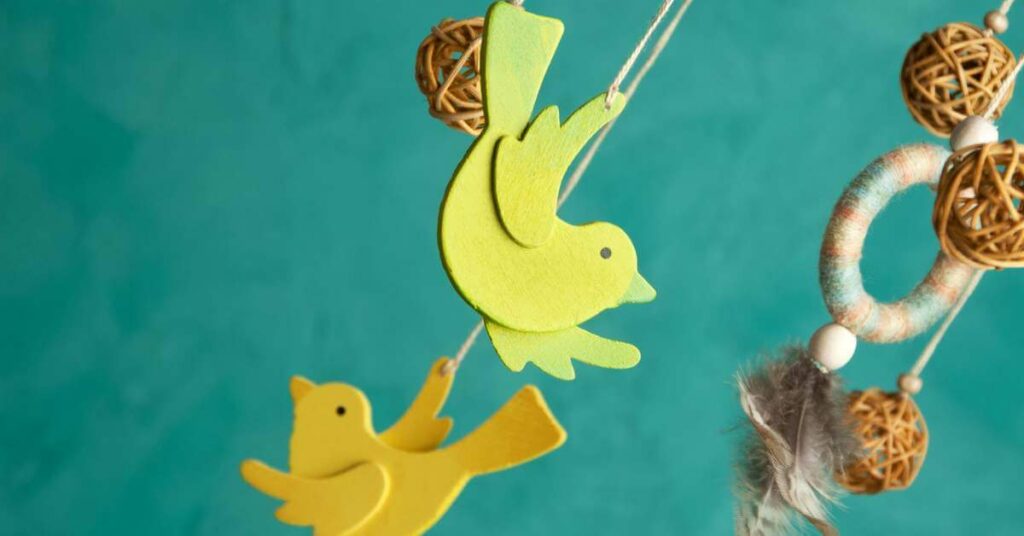
Once you’re ready to start putting together the crib mobile, you should gather everything from the kit. You also need supplies like scissors and whatever toys you’re adding. I chose to make easy paper origami birds for mine, and my daughter loved it. In fact, she looked at the crib mobile and was asleep in minutes, and you can’t beat that!
Hook the Semi-Circles Together
To make the crib mobile, you need to attach the hanging ring to the larger of the semi-circles first. Put the plastic piece around the O-ring. You can make it as long or as short as you want.
I recommend measuring the space from the ceiling (or crib mobile arm) to the bed and make sure that your little one can’t grab ahold of it.
In fact, I wrapped the plastic piece around itself multiple times to ensure that it was on tight and couldn’t fall off.
Now, you want to attach the second semi-circle for your DIY project. Cut a piece of the string included with the DIY kit to the length you prefer. I made mine about an inch or so. Then, slip the string into the end of the larger semi-circle and tie a knot. Do the same for the smaller wooden piece using the attached hooks.
Your baby mobile isn’t quite done yet, but the fun part is just beginning. It’s easy to see how it might hang when you’re finished with the DIY project.
Attach the Toys
Though the balls/beads aren’t white, they are slightly lighter than the rest of the piece. You can use your scissors to cut the string at different or similar lengths. For mine, I chose to measure from the top-down, looking to make sure that the DIY mobile would not be grabbed by my daughter.
For the first four strings, I cut them about six inches, and the one for the middle, I made about 10 inches, but you can use whatever measurements you prefer. Let your imagination go wild. I’m sure you can appreciate the results from this unique and new mobile. Plus, it’s super fun to get other kids involved.
Back to the instructions, I looped the string into the hole of one semi-circle and tied a knot. Then, I threaded a small bead on, tying a knot to keep it in place. From there, I added my paper origami bird by cutting a hole in the center of it on each side. Then, I put a medium bead and then another paper origami bird at the end.
I did that for the other 6-inch strings.
For the one in the middle (longer), I started with a small bead, used the largest bead, and then tied on three origami birds with no beads.
I know it’s hard to see or think about without viewing what I did. However, you can easily find ideas by going online if you want to use a different option. It was super easy to get it all done, and you have a beautiful piece that you can use for a baby shower party or in the nursery.
Ultimately, I think I would prefer to save mine once my daughter gets older. That way, it’s a reminder of what I did for her, but she can also use it as a decoration, looking up at it and focusing on what I created before she was born.
Other Toy Ideas
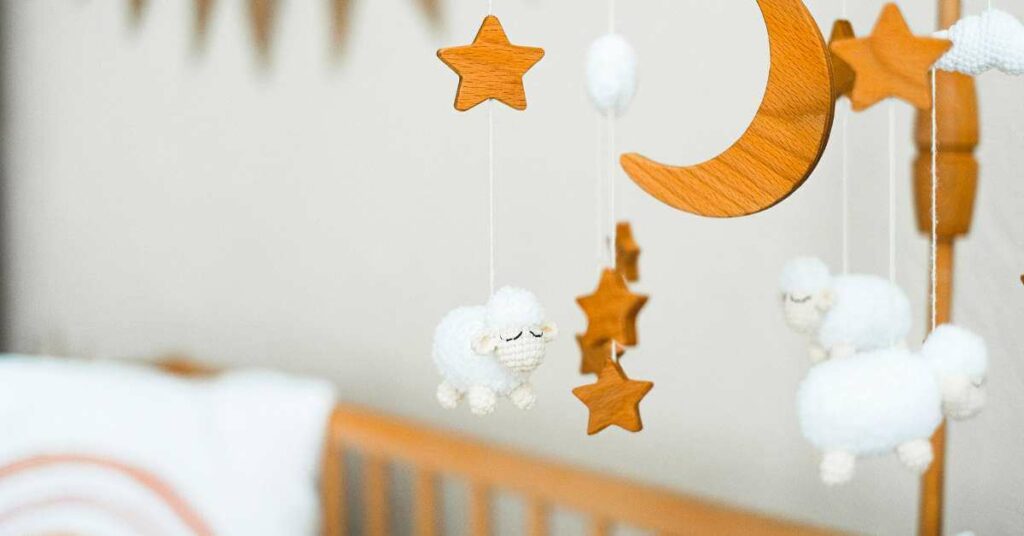
When babies are young, they can’t see colors, so your new craft mobile doesn’t necessarily have to be bright. You can choose to add yarn pompoms, buy toys online, find star and cloud options, or use black-and-white swirls to get the results you want.
While buying new mobiles can be fun, there are so many choices out there. Plus, it’s hard to get the right one, especially when you need something minimalistic. That’s what I chose to do for my nursery.
You can also search for sewing kits that help you create toys if you want to make it a truly handmade mobile.
How to Hang the Mobile
Making mobiles isn’t the only step. Once you’re done, you must take the top and hang it from the ceiling. I bought a mobile arm initially, but the way I created the mobile, it was too long and could hurt my daughter. Therefore, I decided to put the top right into the ceiling of her room.
Though it was a little more work, I found that it worked well and was perfect for my needs, and I had a new mobile that was basic and ready for anything. Though I didn’t have a party to celebrate, I did feel accomplished!
Conclusion
Are you ready to make your own baby mobile for your little one? While color doesn’t matter when they’re young, you might want to have bright colors for later. The perfect thing is whatever you love and what soothes your cranky baby.
If you get it made in time, you can bring it to the baby shower party. Show others what you created and feel the love they offer.
Though there isn’t much color with this mobile from Tatuo, you’re creating a work of art. Your baby is sure to love it, even if they can’t see the colors yet.
Plus, there’s little sewing to do with this option unless you choose to make characters from scratch. Even then, it’s something you’re doing because you want it, so the colors are up to you.
Just make sure you measure before you cut. You want it to be perfect, and that can’t happen if it’s too long and your baby can reach it. It’s for appearances, and the color choice might make them try to grab it.
For the price, it isn’t bad. Plus, you can make a craft that’s modern and suitable for any room. I liked this DIY mobile because of the paper origami I got to make, too. However, if you want something sturdier than paper, there are so many other options.
Link for the DIY Kit.